Chiffon Cake Recipe: Stop Being Afraid of Baking This Cake
Your Blueprint to Tall, Fluffy Cakes is Here.
A Note From the Author: The "It's Not Hard" Promise
Let's get one thing straight: making a tall, fluffy, springy chiffon cake is not hard.
Seriously. It's not.
I know it has a reputation. I know it's treated like some big, ceremonial, high-stakes bake. You read about "strict rules", "delicate meringues", and "fatal mistakes". It's enough to make you want to just go buy a cake.
But here's the secret: chiffon cake isn't a delicate ceremony. It's a staple food. It's a simple, everyday cake made from simple, everyday ingredients. The "rules" you've heard? Most of them are just hearsay.
This page gives you the "what" and "why". I'm here to give you the "no-fear" blueprint. We're going to bust the myths, use the right (and simple) tools, and follow a relaxed process that gets you a perfect, sky-high cake every single time.
The Fool-Proof Master Recipe
For the Eager Ones: Here's Your Guaranteed Success Recipe!
I know some of you just want to dive in and start baking. So here it is—the recipe that works, every single time. No guesswork, no surprises.
But here's the thing: The recipe itself isn't the magic bullet. There are countless pitfalls hidden in the ingredients you choose, the tools you use, and the sequence of steps you follow. Any one of these can silently sabotage your cake.
That's why I encourage you to read on. Understanding the "why" behind each choice and step will transform you from someone following a recipe to someone who truly knows how to bake a perfect chiffon cake—no fear, no failures.
↓ Ready? Let's bake! ↓
6-Inch Chiffon Cake
Perfect for 2-4 servings
| Ingredient | Quantity |
|---|---|
| Egg | 3 large eggs, separated |
| Granulated Sugar | 40g (up to 60g) |
| Milk | 30g |
| Liquid Oil | 30g |
| Flour | 50g |
| Cream of Tartar | 2-3 shakes |
| Vanilla Extract | 2-5g (optional) |
| Salt | 1 pinch (optional) |
🔥 Baking: 300°F (150°C) for 45-50 minutes
Note: Cold eggs are fine.
Sugar: Adjust to your sweetness preference.
Milk: Liquid base (any consistency).
Oil: Olive, canola, vegetable, or grapeseed.
Flour: Any flour listed in Chapter 2.
Cream of Tartar: Essential for no-fail meringue.
8-Inch Chiffon Cake
Perfect for 6-8 servings
| Ingredient | Quantity |
|---|---|
| Egg | 5 large eggs, separated |
| Granulated Sugar | 65g (up to 100g) |
| Milk | 50g |
| Liquid Oil | 50g |
| Flour | 85g |
| Cream of Tartar | 3-4 shakes |
| Vanilla Extract | 3-8g (optional) |
| Salt | 1-2 pinch (optional) |
🔥 Baking: 300°F (150°C) for 50-60 minutes
Scaling Note: All ingredients scaled proportionally from the 6-inch recipe based on egg count (5/3 ratio).
Same Rules Apply: All notes from the 6-inch recipe apply here too!
⚠️ Important:
These measurements are your starting point. But to truly master this cake, you need to understand Chapter 2 (Tools & Ingredients) and Chapter 3 (The Zero-Fear Process). They'll show you exactly how to avoid the hidden pitfalls that cause most failures.
"But I Heard..." (Scary Chiffon Myths... Busted!)
Let's deal with all the hearsay rules that make this cake seem so terrifying.
Myth: "Don't stir the egg yolk batter too much, it will be overmixed."
If you use the right mixing sequence (which we'll show you), there's no such thing as overmixing the yolk batter. Whisk away!
Myth: "You must use cake flour."
All-purpose flour is perfectly fine. You're right that cake flour makes the cake less likely to get chewy or rubbery, which gives it that super-tender, professional crumb. But it's not a deal-breaker!
Myth: "You must add the sugar to the meringue little by little."
Not necessary at all. We'll show you a much faster, simpler way that works just as well.
Myth: "You must beat the meringue to a specific stiff peak."
Not really. A successful chiffon can be made from a reasonably flexible range of meringue doneness. Stop stressing about getting it "perfect".
Myth: "A successful chiffon must have a perfect, non-cracking top."
The only real indicator is that the cake is springy; i.e., when pressed down, it can return to its original height. The top can easily get cracks. People just trim off the 'ugly' (but tasty!) top for cosmetic reasons.
Myth: "A non-stick cake pan will not work."
It's not the perfect tool, that's true, and a classic aluminum pan is definitely better for climbing. But does it work? Yes. (I'm using one!) We'll show you how to handle it.
Fact: "Your meringue bowl and beaters must be 100% oil-free and water-free."
This is it. This is the only rule that is 100% true and non-negotiable. Fat is the mortal enemy of meringue and will stop it from whipping up. This one, you must follow.
Your "Success" Station: Best Chiffon Cake Tools & Ingredients
This isn't about an expensive kitchen. It's about having the right team of tools and ingredients ready to go. Here are my recommendations.
Part 1: The "A-Team" Toolkit
Cake Pan
All I ask for is a removable bottom! This lets you get the cake out without breaking it.

Springform / Removable Bottom Pan
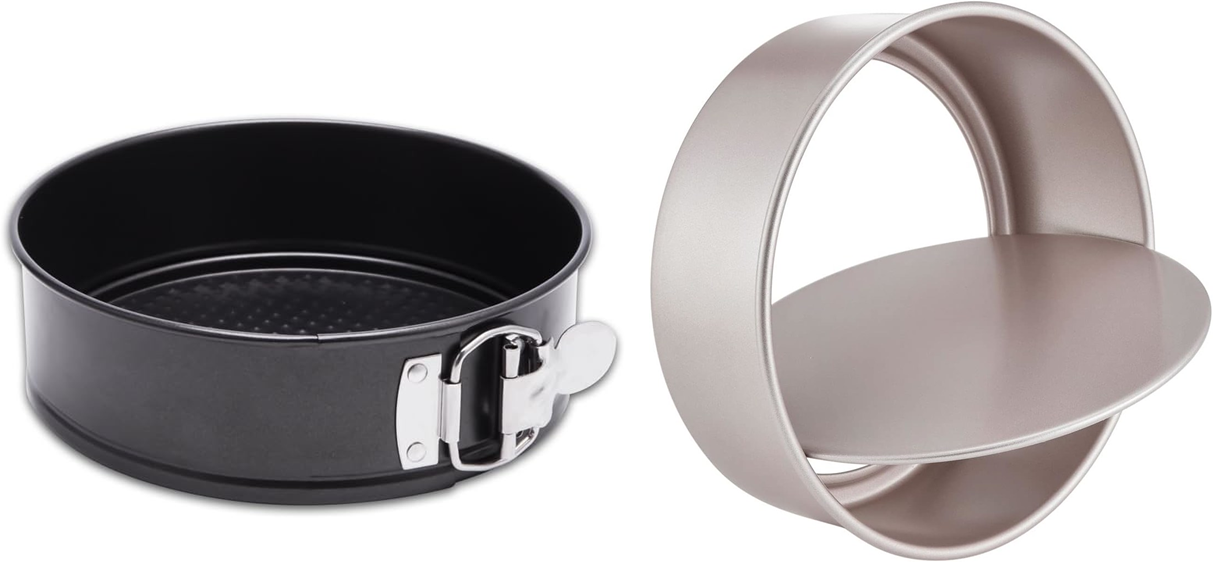
The latching side or push-up bottom is key. Very versatile for round, square, or even heart shapes.
Shop more Springform/removable bottom Pans →Mousse Ring + Foil
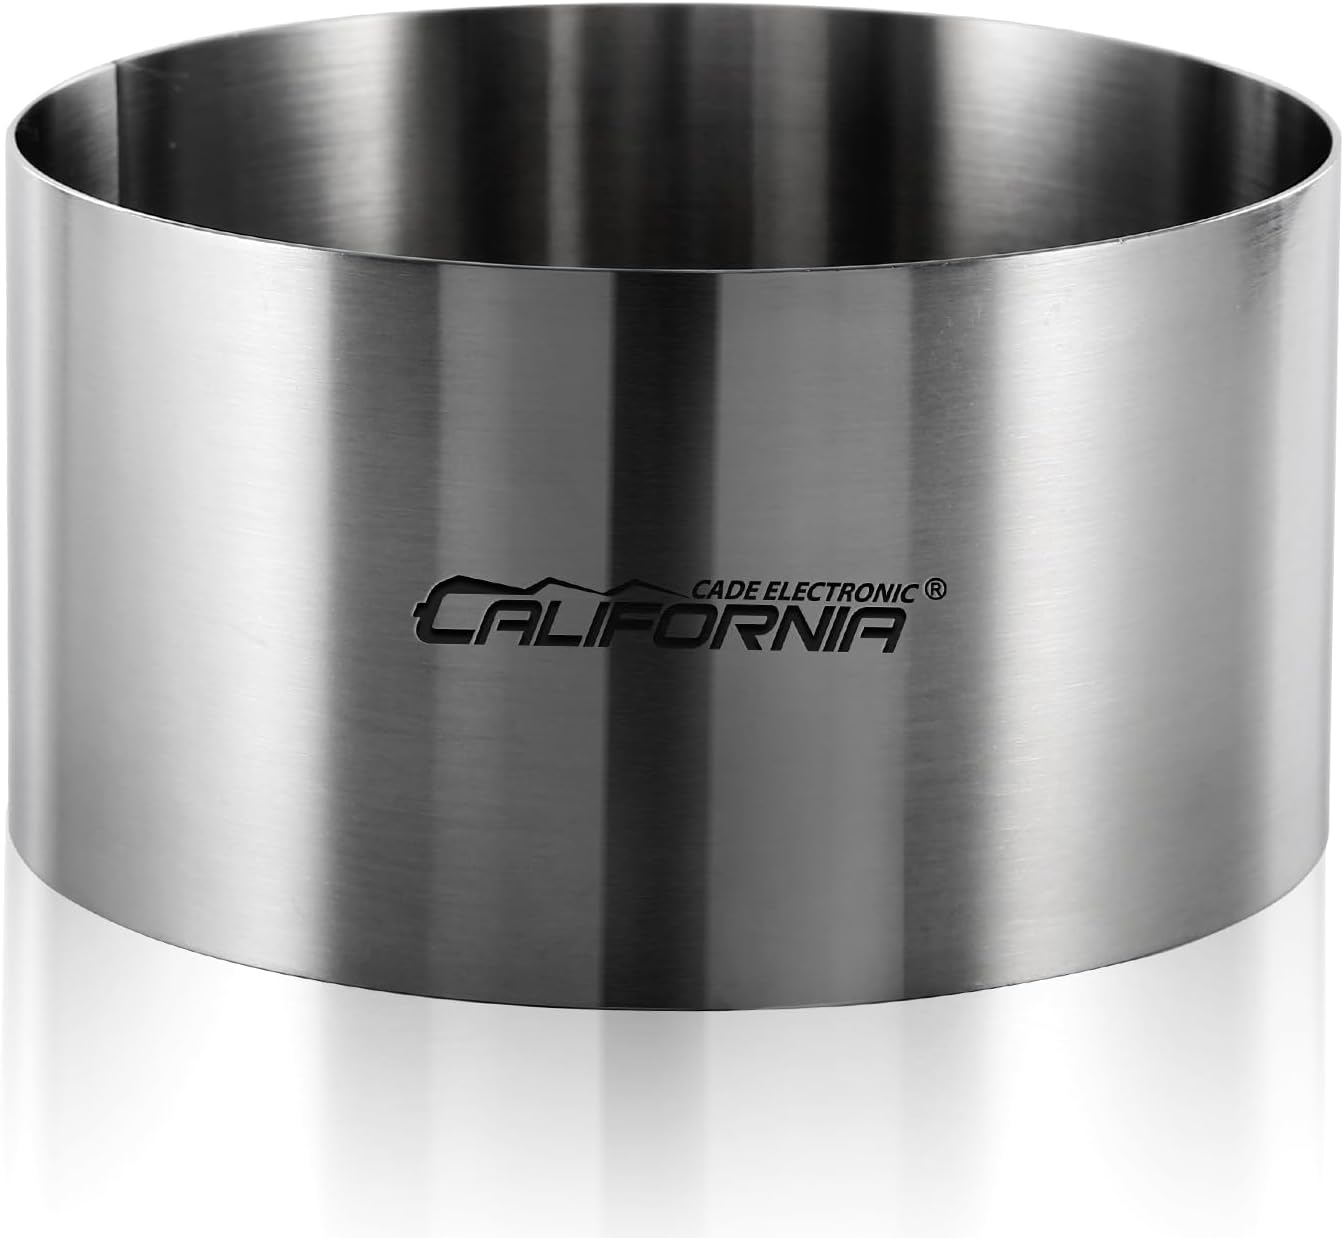
A pro trick. Wrap the bottom in 2-3 layers of heavy-duty foil.
Shop more Mousse Rings →
Mixer
You need electric power for the meringue. A simple handheld is all you need.
Electric Hand Mixer

The workhorse. Any $20 model will do. Perfect for both batter and meringue.
Shop more Hand Mixers →Stand Mixer (Optional)

Nice to have for hands-free mixing, but absolutely not necessary.
Shop more Stand Mixers →Mixing Bowls
You'll need two. One for the yolk batter, and one very clean one for the meringue.
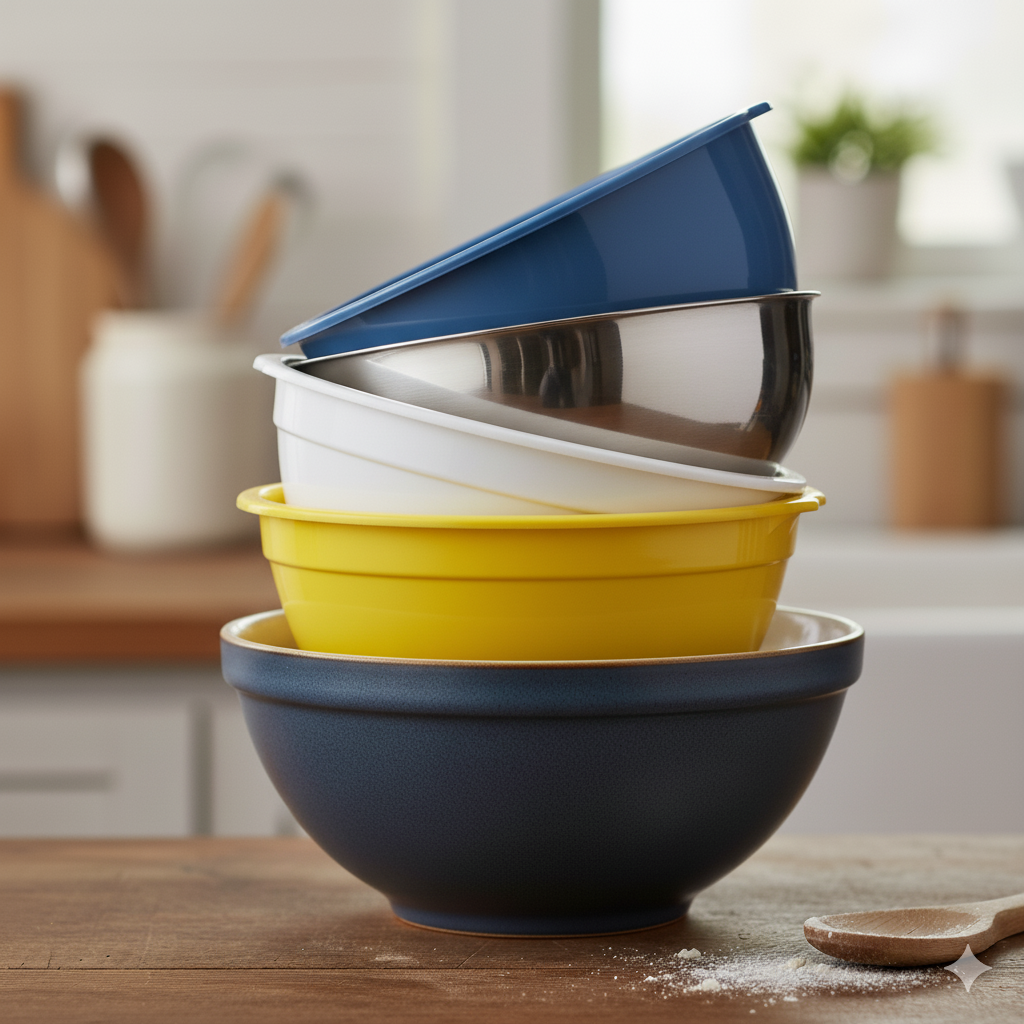
Meringue Bowl (Important!)
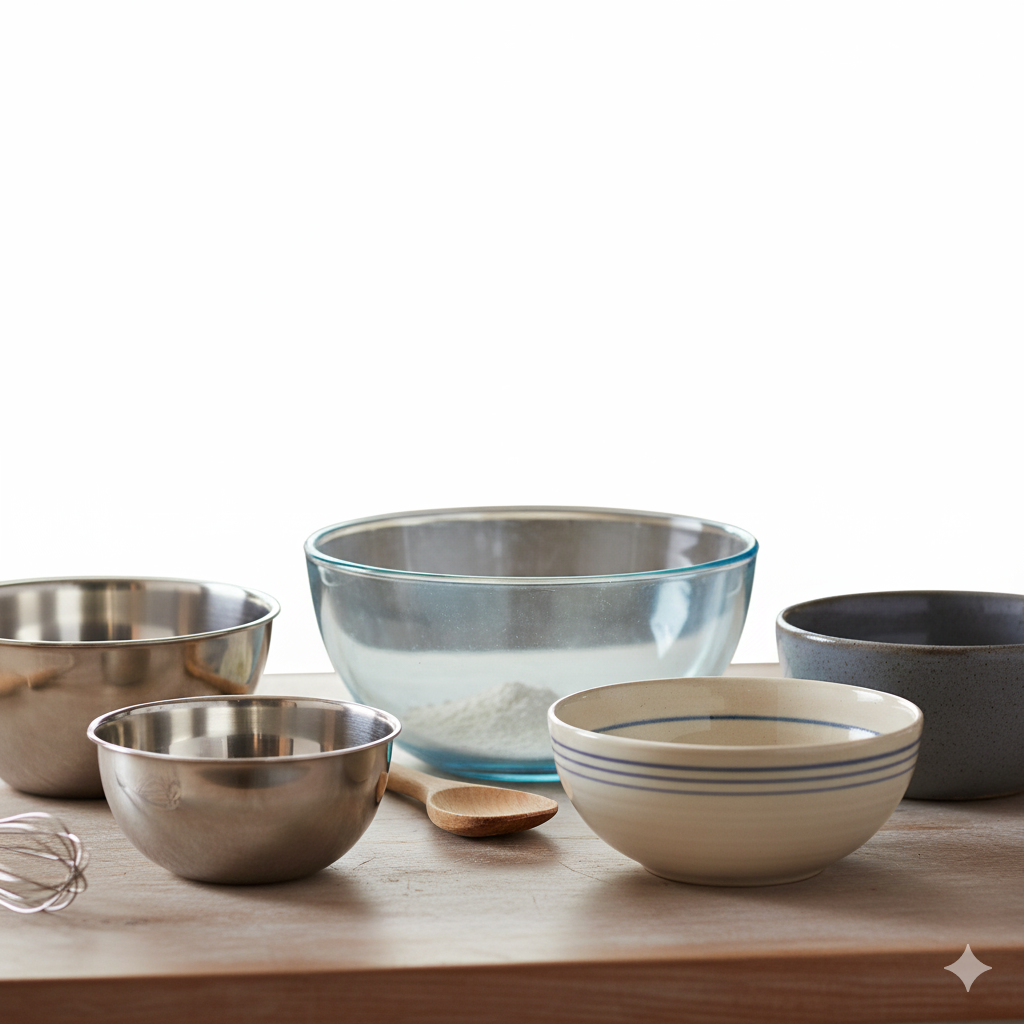
Must be oil/water-free. Glass, stainless steel, or ceramic are perfect. No plastic!
Shop more Mixing Bowls →Oven
Surprise! You have choices. Smaller is often better and saves energy.
Toaster Oven (My Fave!)

My favorite for a 6" cake. A ~$60 toaster oven needs little preheat and saves energy.
Shop more Toaster Ovens →Countertop Oven

A great middle-ground. Tends to preheat faster than a big oven.
Shop more Countertop Ovens →Large Range Oven

Works perfectly, but it's oversized for a 6" cake and wastes energy.

Spatula
For the all-important "Magic Fold" to combine your batter and meringue.
Flexible Silicone Spatula

Any flexible spatula will do. This is critical for folding gently.
Shop more Spatula Sets →Measures
A scale is my top pick. It's easier, more accurate, and means less washing up!
Kitchen Scale (Preferred)

A nice ~$15 scale is cheaper than a full set of cups and spoons!
Shop more Kitchen Scales →Measuring Cups (Option 2)

If you prefer them, they still work. A scale is just simpler.
Shop more Measuring Sets →Part 2: The "Five-Star" Cast of Ingredients
Flour
You've got so many options here, so don't let anyone tell you must buy one specific kind.
Cake Flour

People love to say this is a must-have. It's not. It's often expensive and hard to find. Its only job is to reduce gluten (the stuff that makes bread chewy), but it's not necessary.
Shop more Cake Flours →Plain All-Purpose Flour
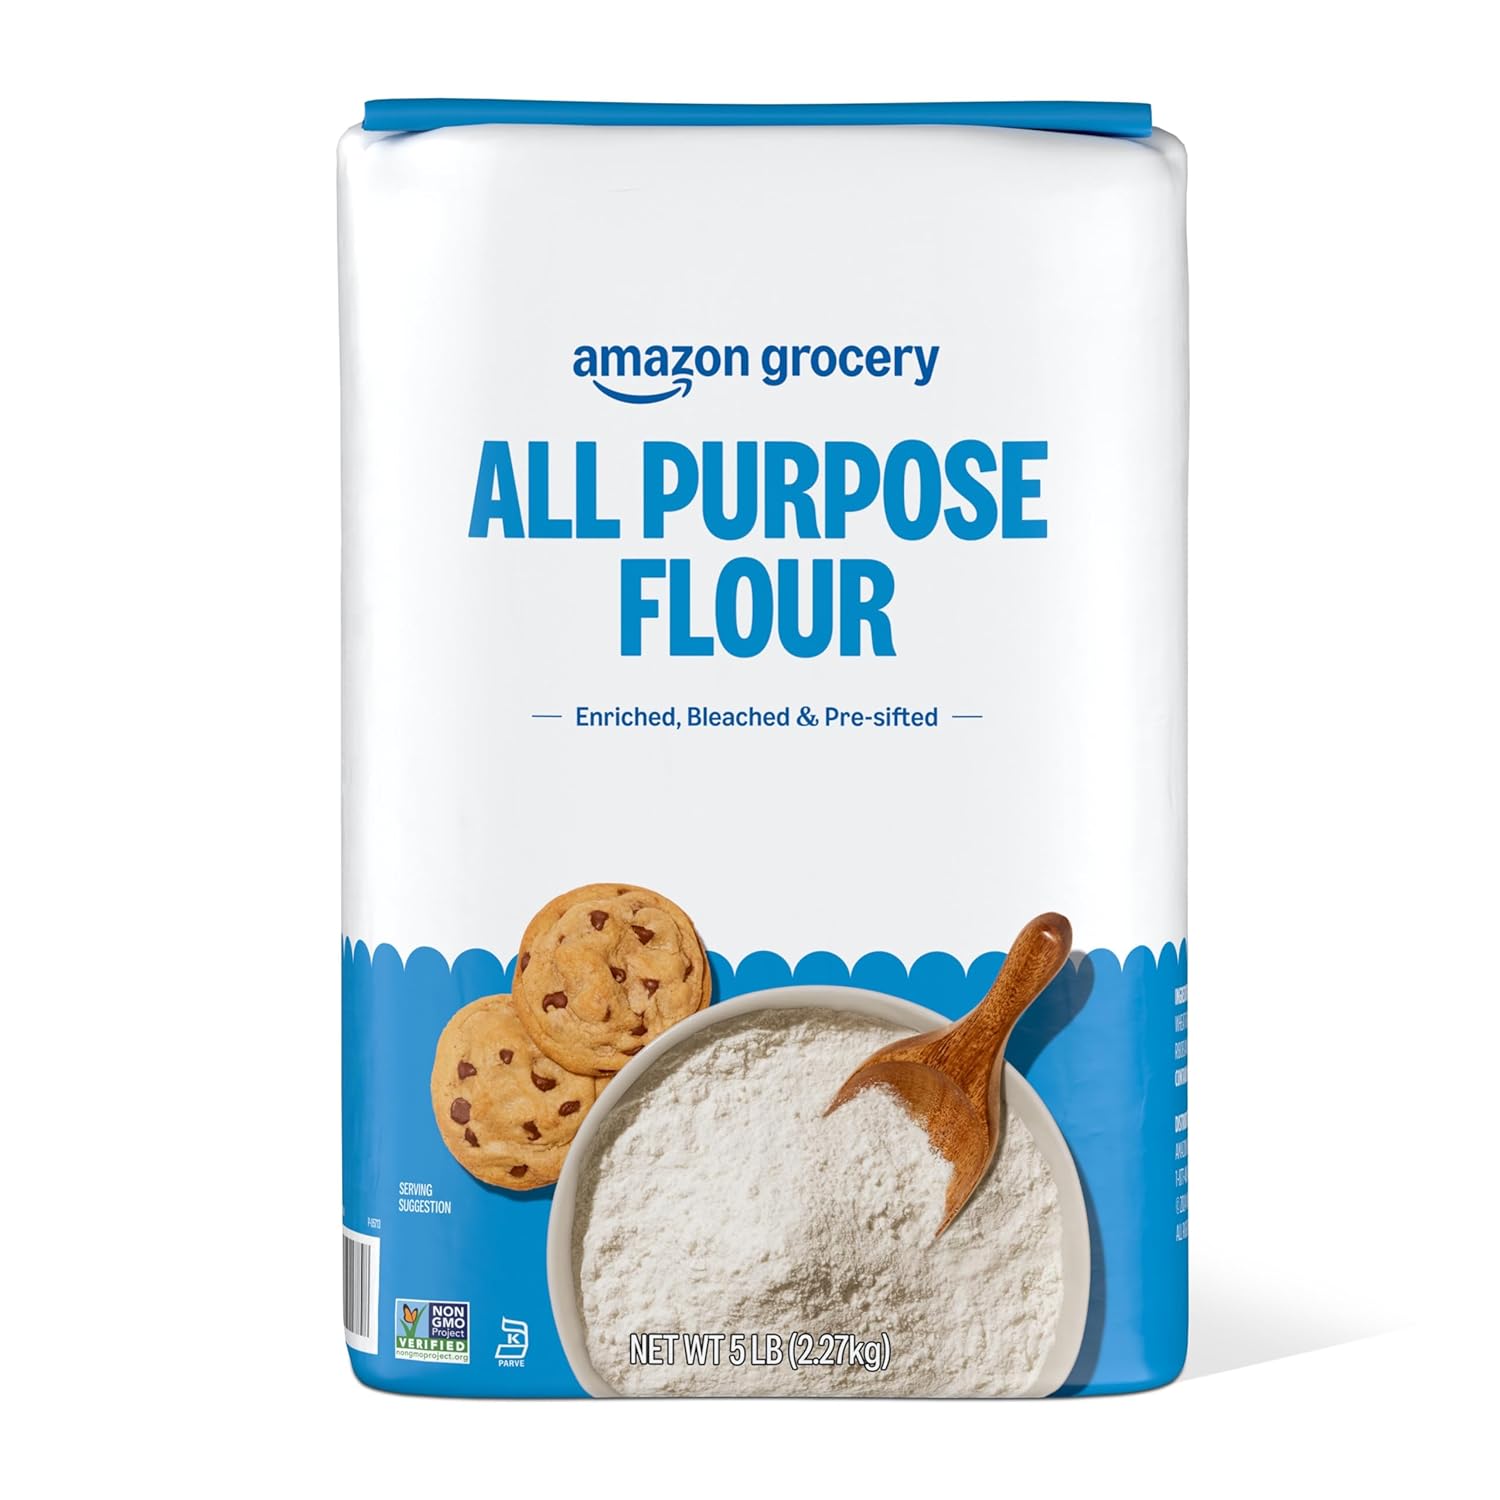
This is my go-to. With the mixing sequence I'll show you, you don't need to worry about overdeveloping gluten.
Shop more All-Purpose Flours →Self-Made "Cake Flour"
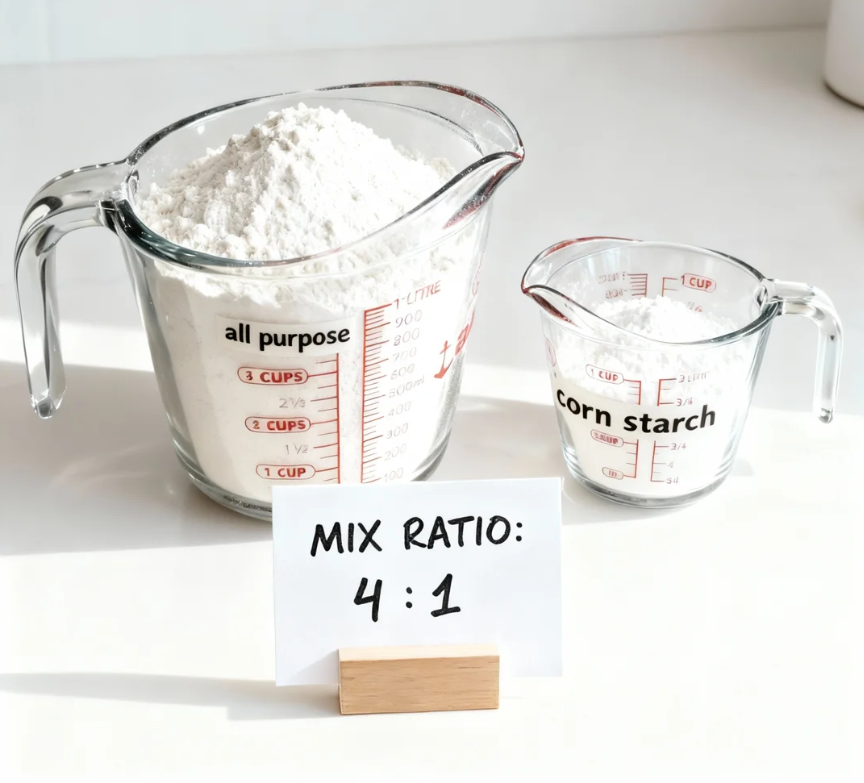
Mix 4 parts all-purpose flour with 1 part cornstarch.
Healthier Options
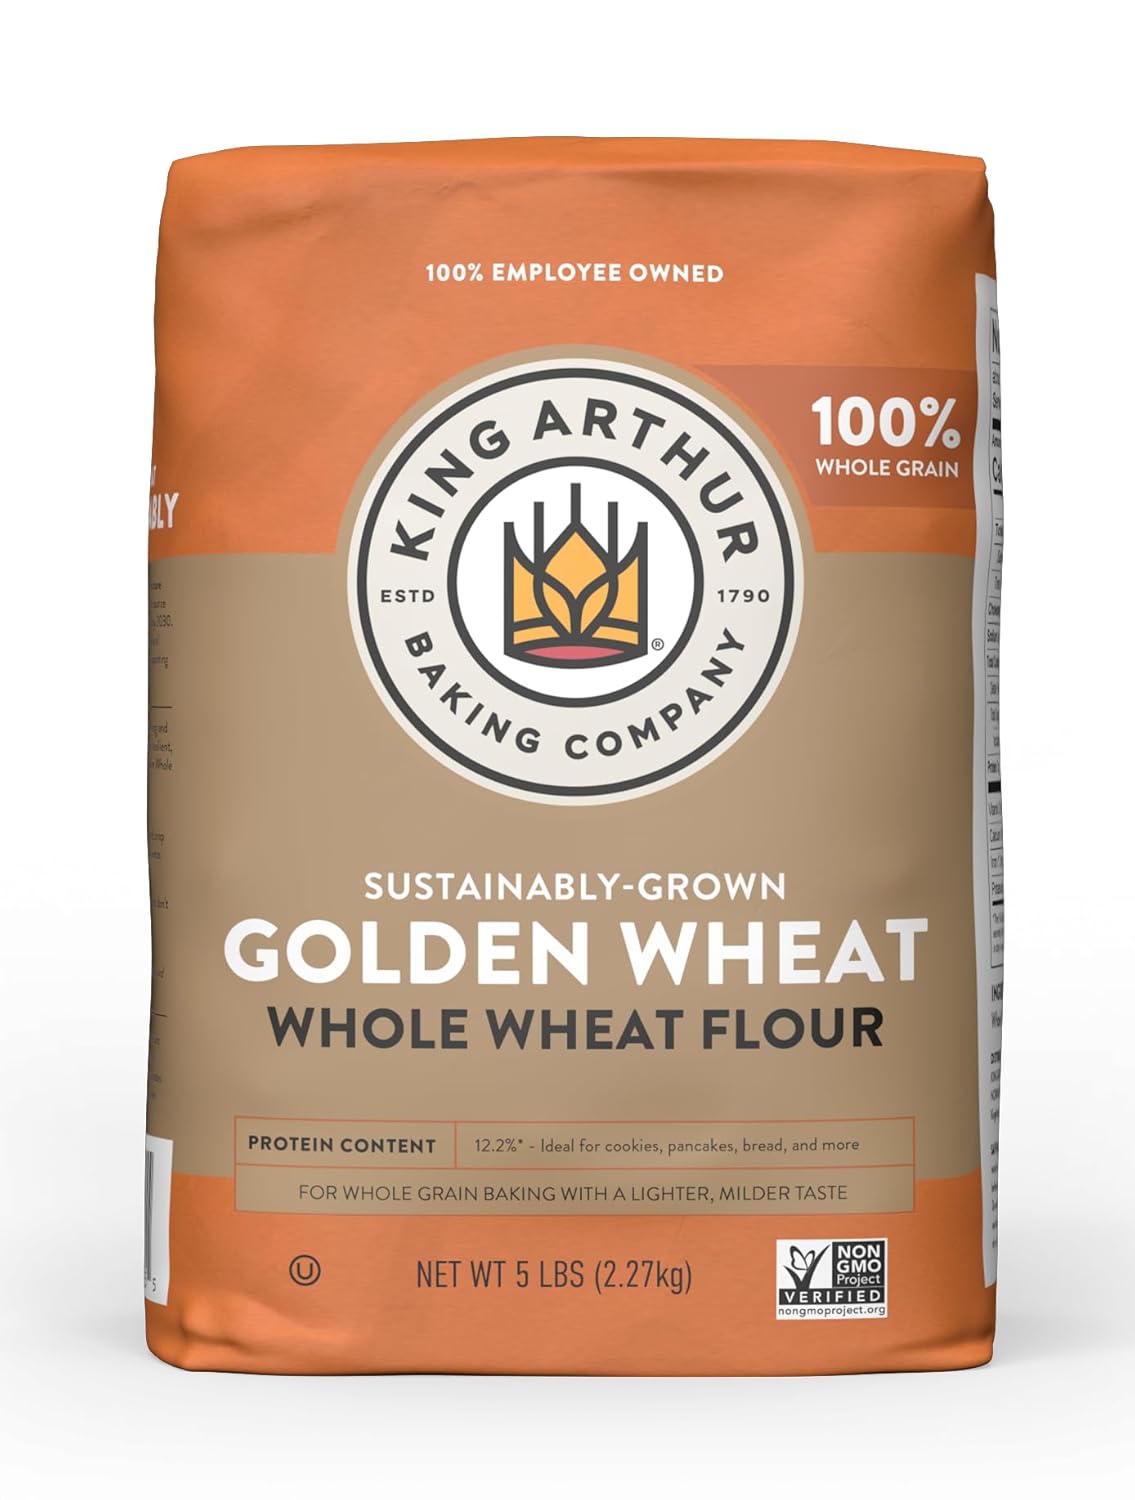
You can absolutely use whole wheat flour, either with or without a little cornstarch.
Shop more Whole Wheat Flours →My Favorite

If you want the best of both worlds, the Whole Foods brand organic whole wheat pastry flour is perfect.
Shop more Pastry Flours →Eggs
Any large-size egg is perfect. Grabbing them straight out of the fridge is perfectly fine and actually makes them easier to separate!
Sugar
No need to get fancy. Any regular granulated sugar you have in your pantry is perfect.
Liquid Oil
This is the 'chiffon' secret! Any oil that's liquid at room temperature will work (olive, canola, vegetable, grapeseed, etc.). I've even used gently liquefied coconut oil and it worked beautifully.
Liquid
Traditionally, people use milk. But you can easily use any other liquid that has the same consistency to change the cake's flavor. Think fruit juice or coffee!
Cream of Tartar

This is the essence of a stable, no-fear meringue. It's what allows your meringue to withstand all the mixing and folding.
The "Zero-Fear" Process: Step-by-Step Chiffon Cake Blueprint
The Revolutionary Blueprint Explained
This is it. Now let's focuse on the how and the why behind the process—it's your master class in stress-free chiffon baking.
🎯 The Master Blueprint Flow
(Forget about others' sequence and technique, just follow mine!)
Prep & Oven (Optional)
Prep: Have one medium bowl for the yolk batter and one spotlessly clean large bowl for the meringue.
Oven Note: Conventional recipes demand immediate pre-heating, assuming the finished batter is too fragile to wait. Our process is more stable, allowing the batter to be more patient. If you're using a large-range oven and want to be super cautious, pre-heat to 300°F (150°C) now. For smaller ovens, wait until step 10 to save energy.
Yolk Batter: The No-Gluten, No-Lump Secret
The "Oil Batter"
Pour the liquid oil into the yolk batter bowl, and dump all the flour into the oil without sifting. Whisk however you want—no special motion—until there are no clumps. Don't worry about overmixing, you won't.
💡 Why it works: How to prevent lumps in chiffon cake batter? Flour only forms lumps and tough gluten when it contacts water (or wet ingredients) directly. By mixing the flour with oil first, you coat every starch particle in fat. This creates an unbreakable barrier that prevents gluten development, allowing you to whisk as long as you need to ensure a lump-free, tender batter.
Separate Eggs
Drop the yolks into the oil-flour batter and the whites into the clean meringue bowl.
Finish Yolk Batter
Dump 10g sugar and the liquid into the yolk batter. Mix until uniform. Leave aside.
💡 Why it works: Is it safe to whisk the yolk batter vigorously? Because the flour is coated in oil and fully de-lumped, the added yolk and liquid simply dilute the batter. A few quick swirls are enough to create a smooth yolk batter. You don't need to worry about overmixing, since the foundation (flour) is already stabilized.
Meringue: Fast, Stable, and Flexible
Add Sugar & Stabilizer
Dump all the remaining sugar into the egg whites. Add Cream of Tartar with 2-3 solid shakes from the shaker—you don't need to be precise.
💡 Why it works: Why use Cream of Tartar in chiffon cake meringue? Sugar provides structure but also slows the whipping process, contributing to the perceived "fragility" of meringue. Cream of Tartar is the secret weapon: a powerhouse stabilizer that renders the bubbles virtually unbreakable. By using it, you can dump all the sugar in at once and simply focus on the final peak status, eliminating the need for fussy, timed sugar additions.
Whip Start
Start your electric mixer on low speed just to keep the sugar and stabilizer from dusting your worktop. If you don't mind a little powder, you can ramp immediately to top speed.
Ramp Up
Once no powder is visible, ramp the mixer to mid or high speed, or even stay at low speed if you prefer. Speed is genuinely not that important; the Cream of Tartar and consistent mixing are doing the real work.
Check Peaks
This is the only step that requires observation, but don't stress. Once you see sharp, non-disappearing swirls (Fig.2), begin checking the peak stiffness. Stop the mixer, run the whisk through the meringue near the bowl wall, and lift it. We recommend checking every 30 seconds.
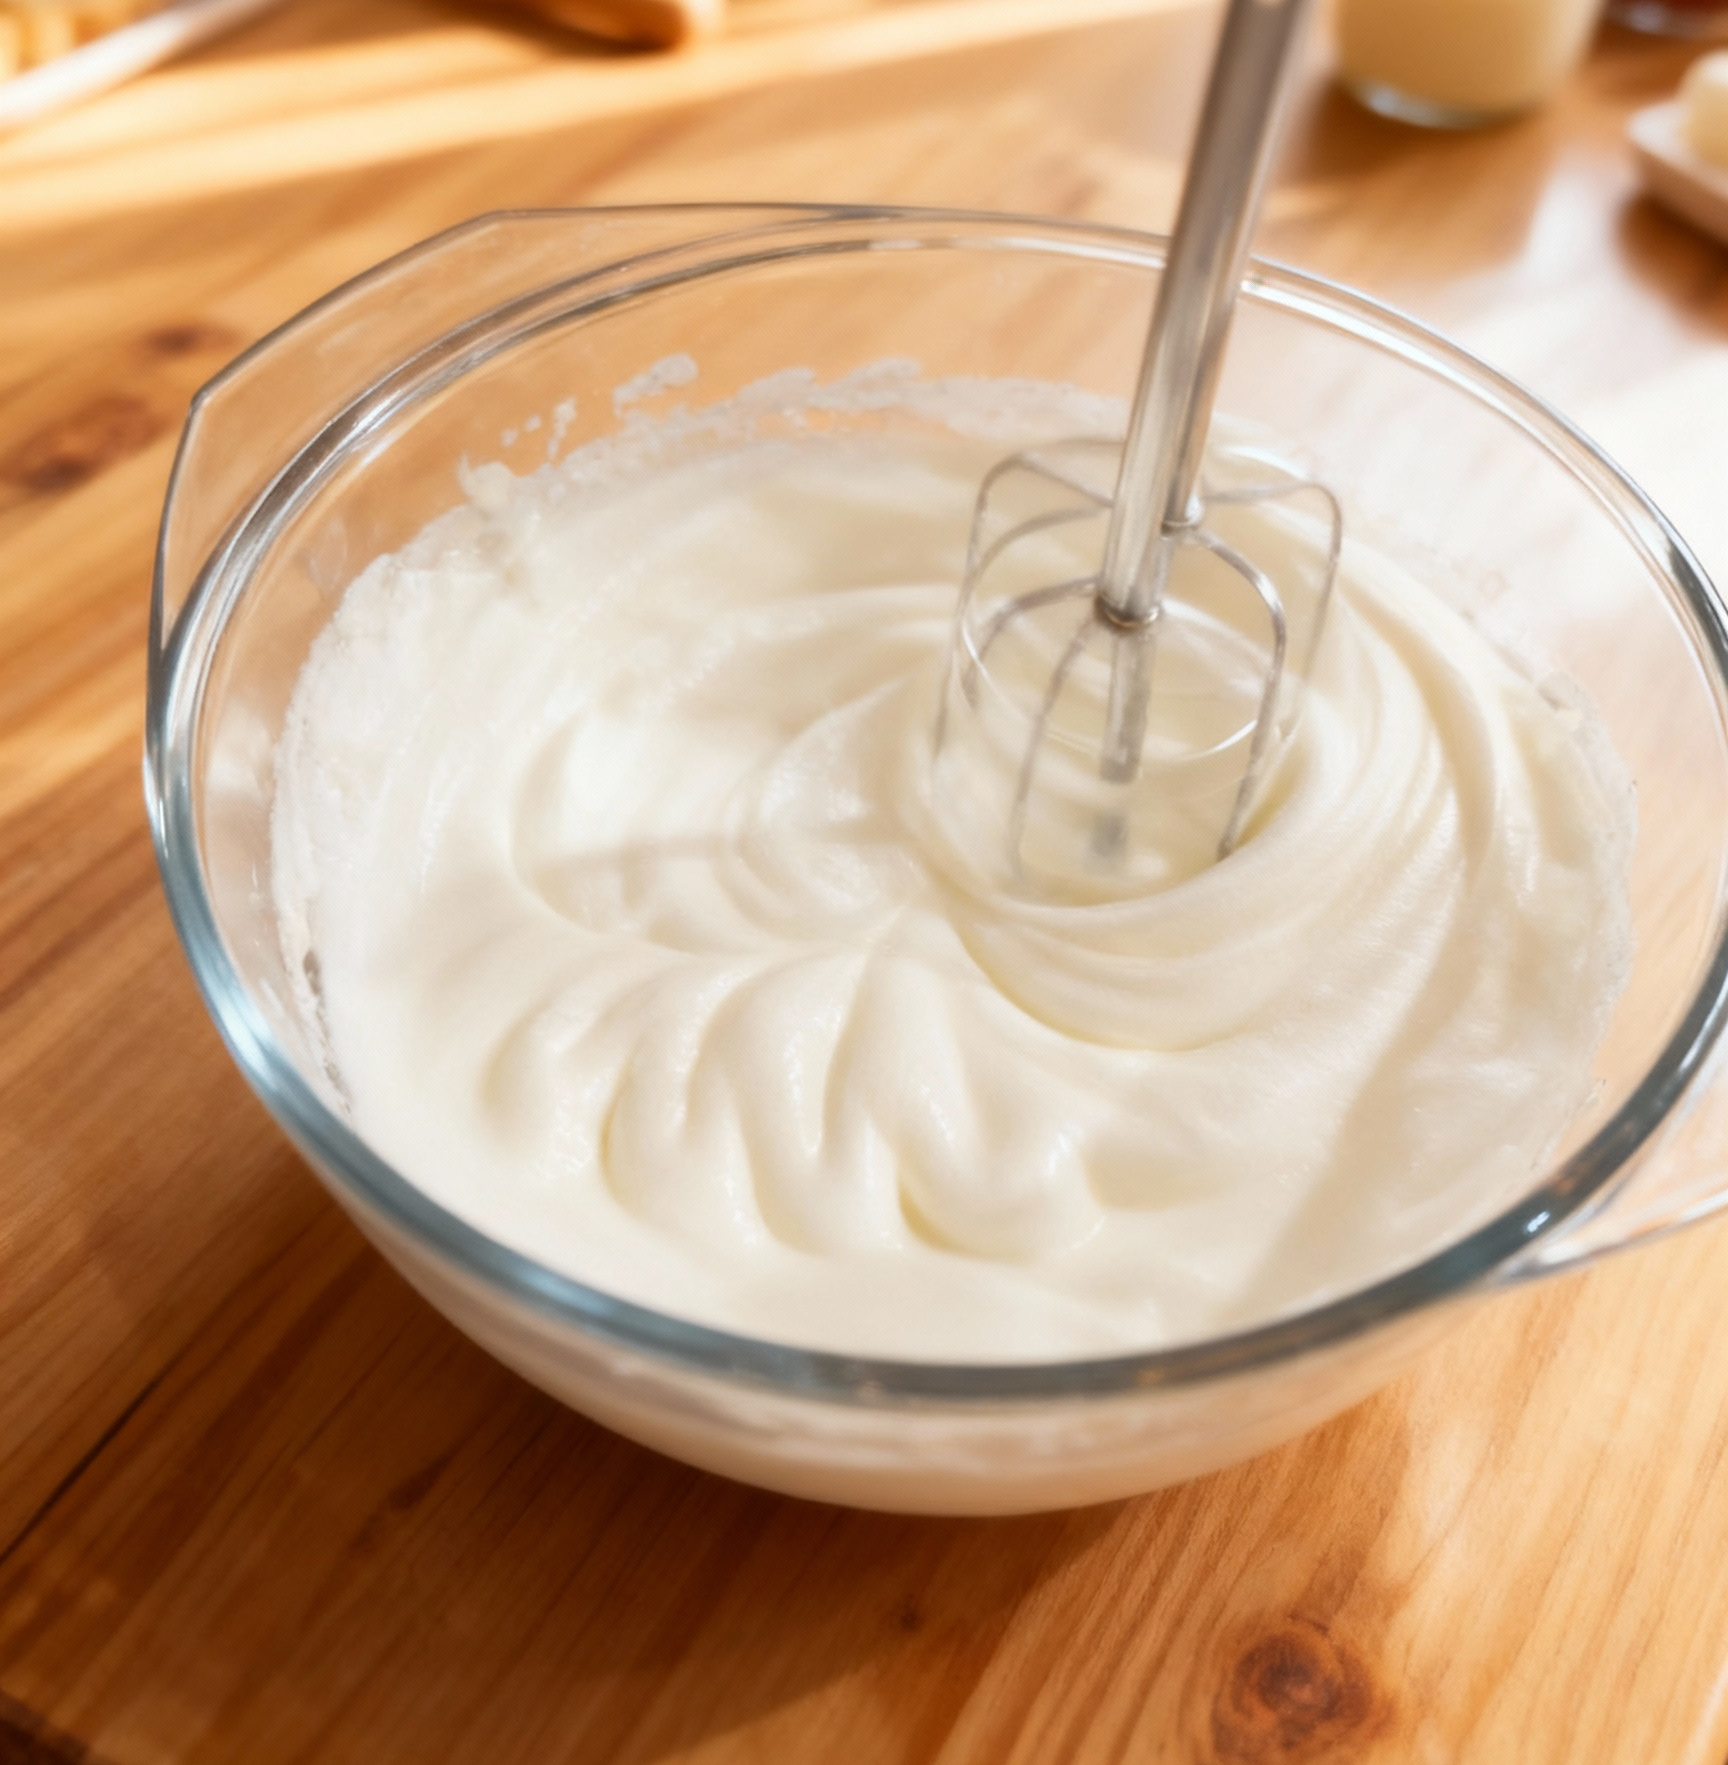
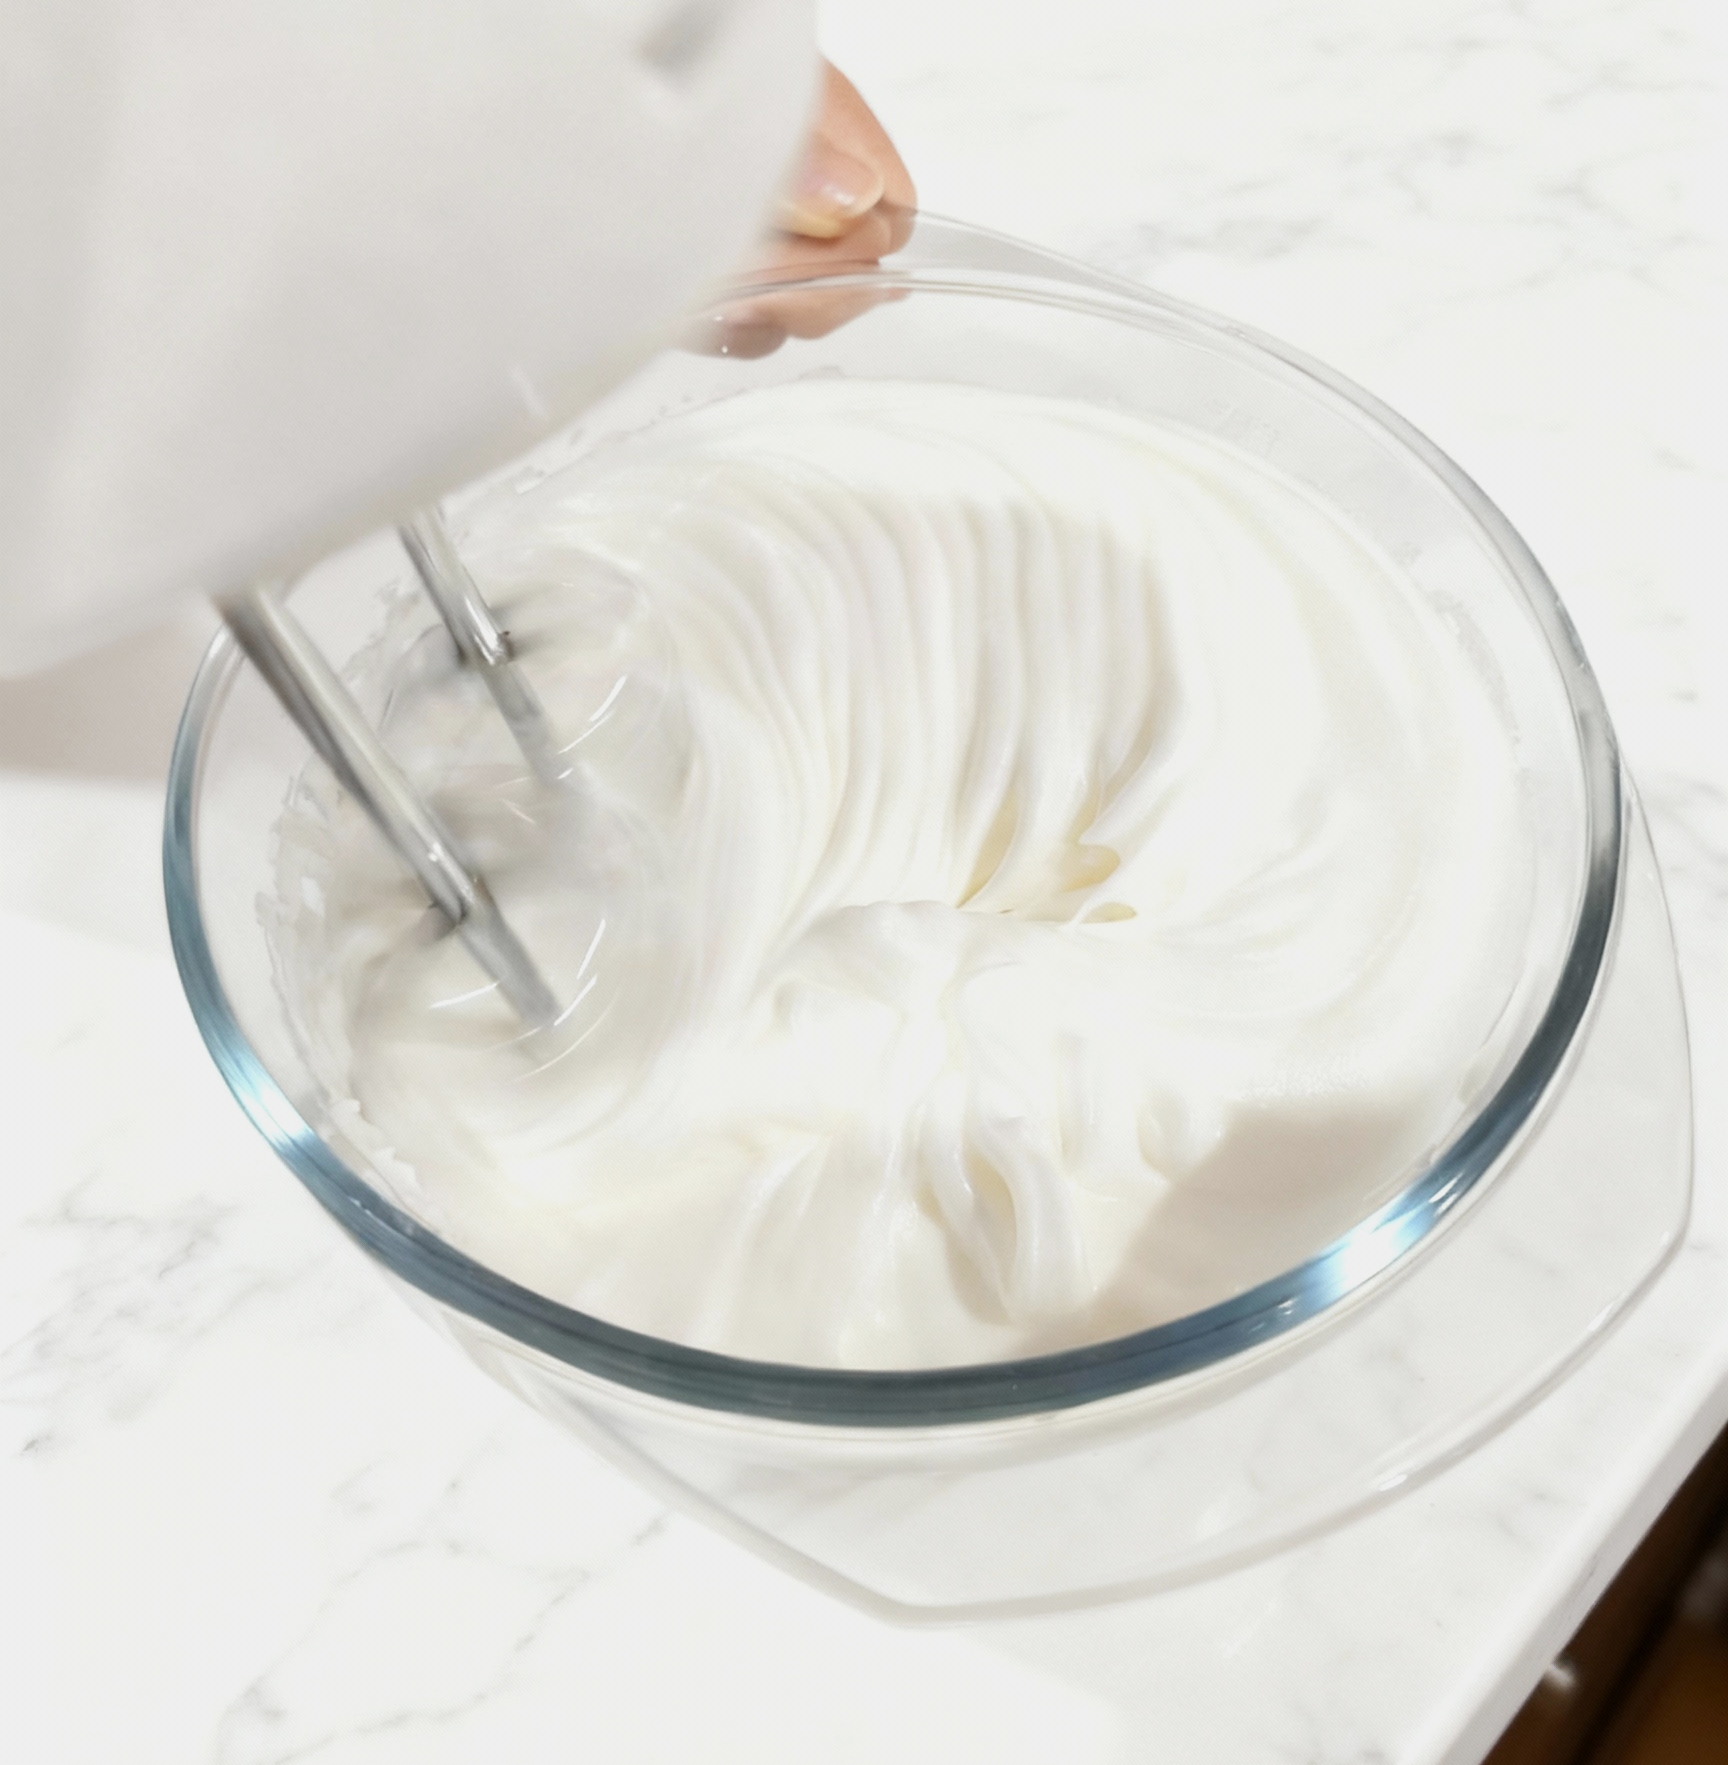
💡 Why it works: What is the right peak stiffness for chiffon meringue? People swear by specific peak shapes, but Cream of Tartar gives you a wide, forgiving range of acceptable stiffness. Your goal is simply a firm-but-flexible peak. Don't worry about under- or over-mixing—if it stands up but curls slightly, you've nailed it. (4 Image Placeholders for acceptable peaks.)
Batter Assembly: The Magic Fold and the Perfect Pan
Oven Pre-heat & Pan Prep
If you haven't already, preheat your oven now to 300°F (150°C). Take out the bottom of the cake pan, wrap the top surface with aluminum foil, and put it back into the pan.
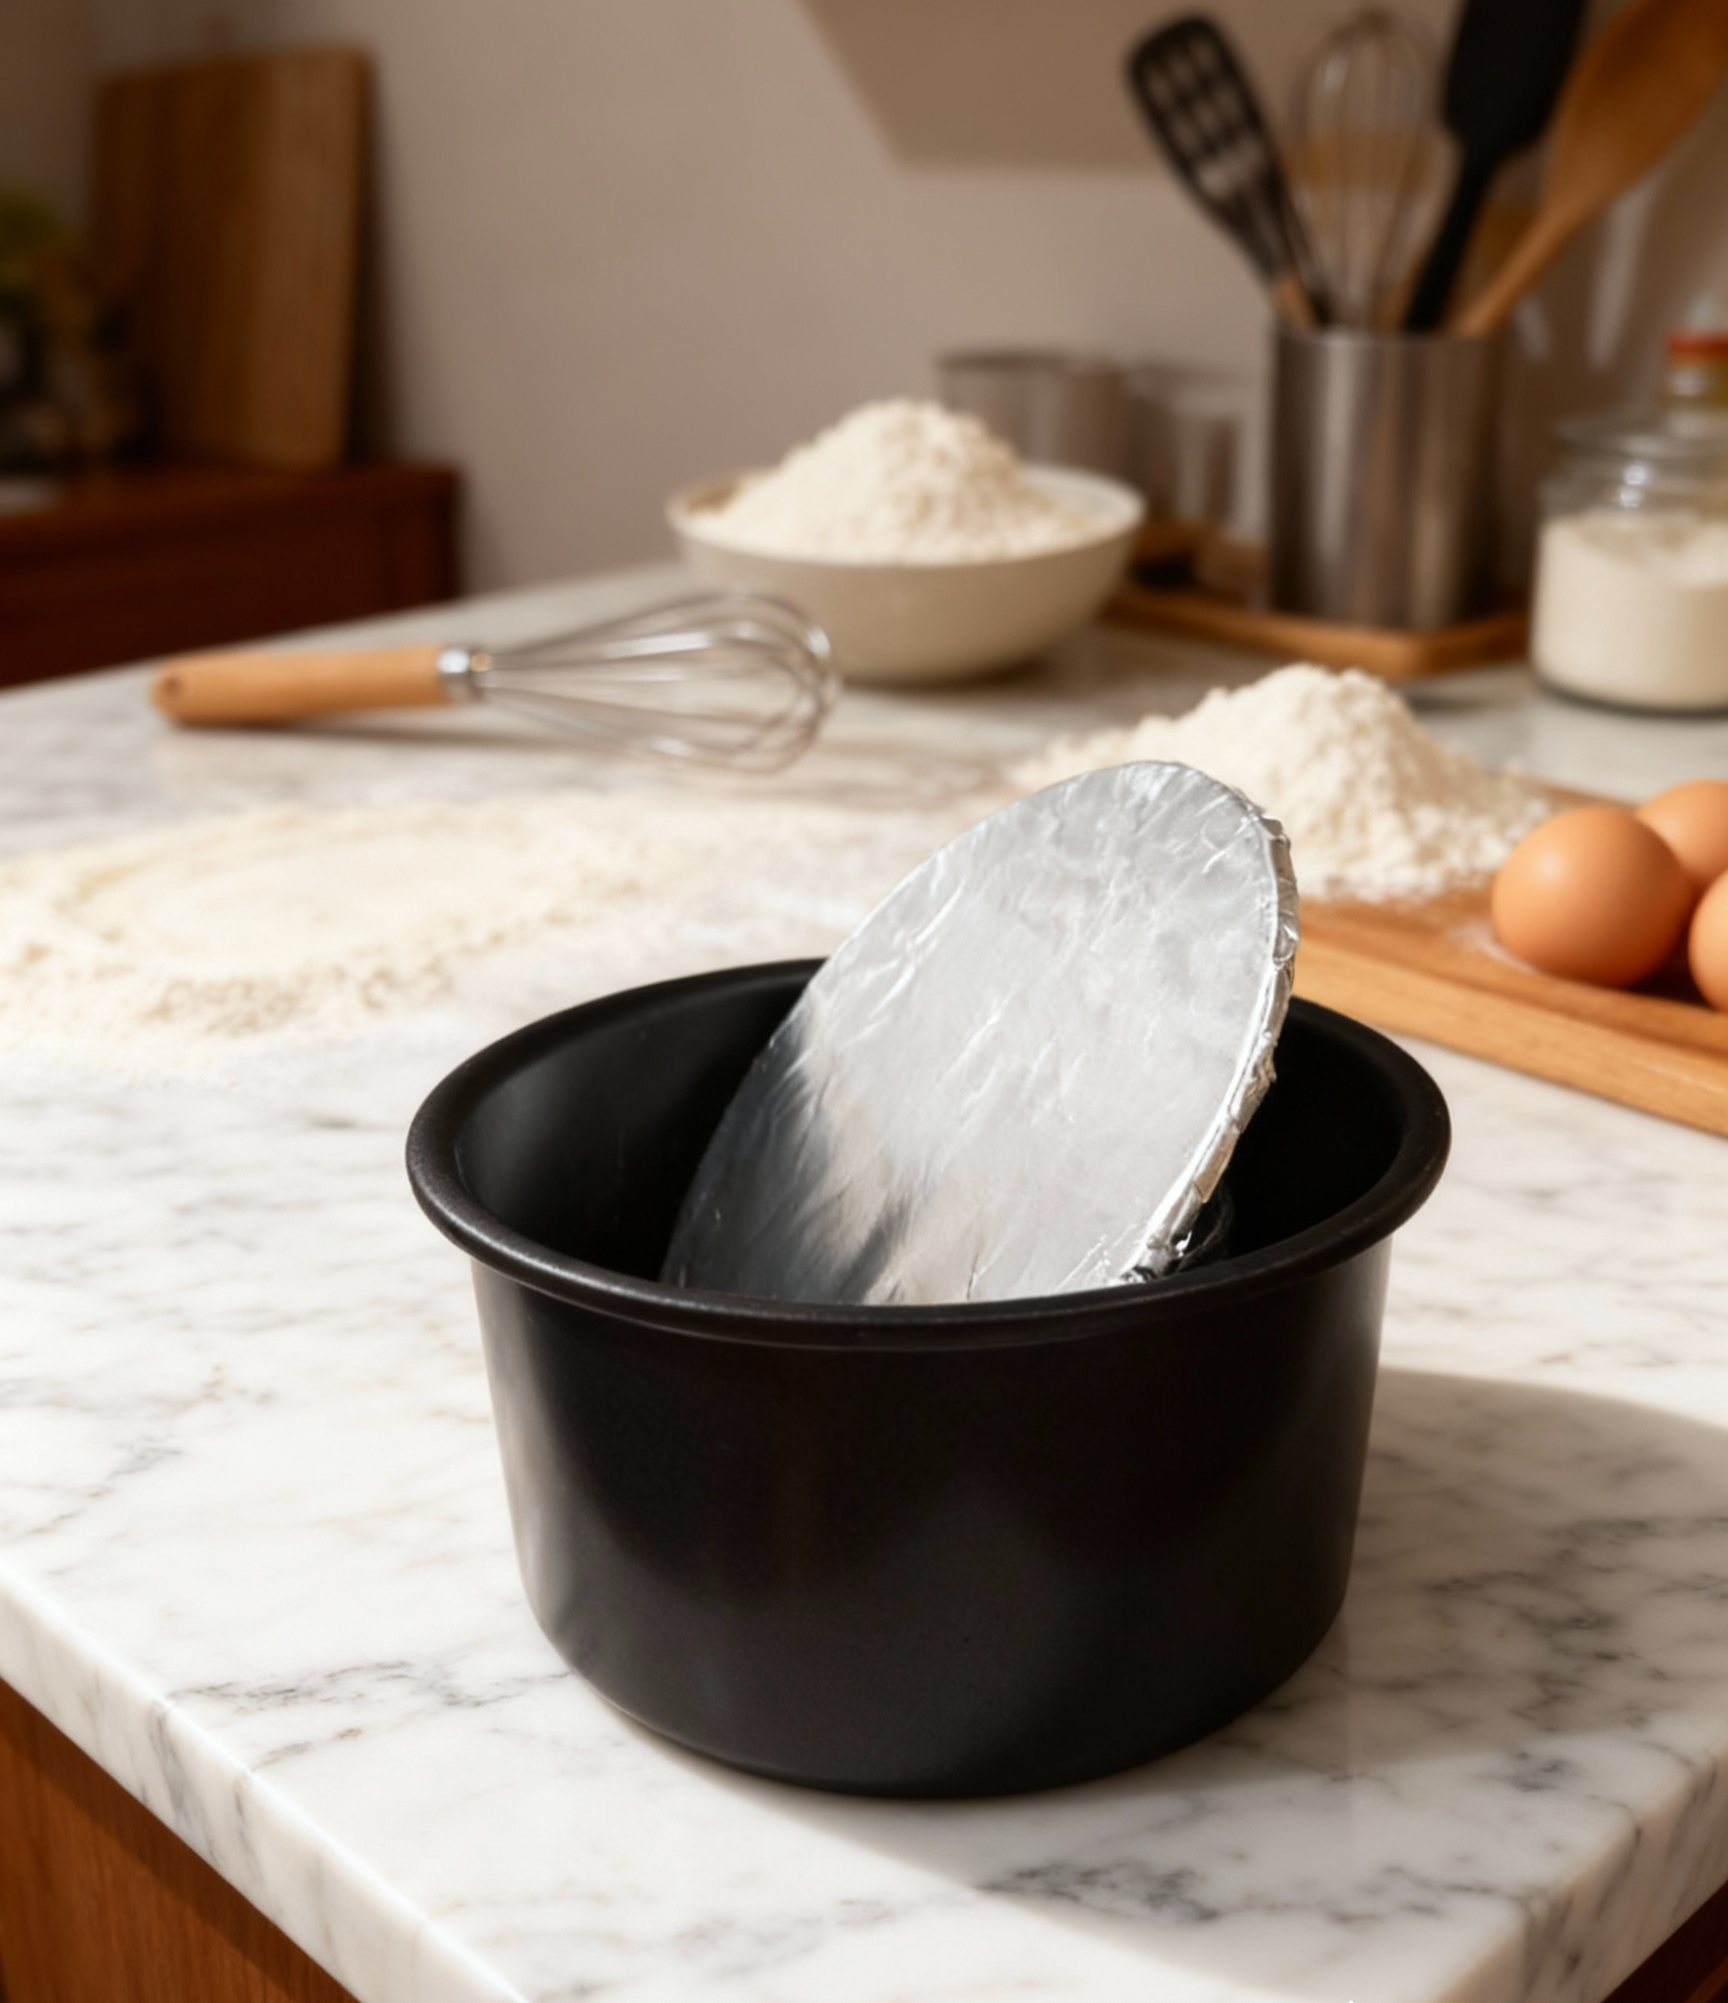
💡 Why it works: How to get a perfect, flat chiffon cake bottom? The foil creates a uniform, flat, fresh surface, which promotes a uniform, beautiful cake bottom. This is the secret to getting a "perfect" looking cake ready to show off.
The First Fold (Lightening)
Scoop about 1/3 of the meringue into the yolk batter. Mix with the "Cut, Scrape, Fold" motion until uniform.
💡 Why it works: Why perform the first fold in chiffon cake batter? This is a warm-up. You're just matching the density of the two batters so the final mix is less prone to sudden collapse. The "Cut, Scrape, Fold" motion reduces the air bubble bursting during the mixing. There are plenty of sources out there to show the detailed motion; I'm not going to waste time here.
The Magic Fold (Structure)
Pour the lightened yolk batter all back into the main meringue bowl. Use the "Cut, Scrape, Fold" motion until you see no white streaks.
💡 Why it works: When should I stop folding the chiffon batter? Work quickly but gently. The instant the white streaks disappear, stop—do not overmix. The air bubbles are now supporting the cake structure; don't risk collapsing them with another unnecessary fold.
Pan It & Tap
Hold the bowl about 1 foot above the pan and pour the batter in to about 70% of the height. Gently shake the pan to flatten the surface, then tap the pan on the counter 5-10 times to pop large air bubbles.
💡 Why it works: Why pour chiffon batter from a height and tap the pan? The one-foot pour stretches and stabilizes the air bubbles as they land. The gentle shake flattens the top surface, and the hard taps eliminate huge, unsightly air pockets inside the cake.
📝 Note: I know I left out the flavor and the food color part, for a good reason. I'll address it later.
Baking & Cooling: The No-Shrink Finish
Baking
Bake at 300°F (150°C). (If you are using a small toaster oven, you may loosely put a piece of aluminum foil over the pan to prevent the top from burning—totally up to you.)
The Test (The 5-Minute Rule): Bake for 40-50 minutes. You are done when you see the cake grow tall, may or may not drop back, and then there is no height change for over 5 minutes.
💡 Why it works: How do I know my chiffon cake is fully baked? You don't need a toothpick. When the cake's height stabilizes for a full 5 minutes, it confirms the structure is fully set and cooked all the way through.
Hard Tap
Take the cake out right away, and tap it hard on the table once.
💡 Why it works: Why tap a chiffon cake on the counter after baking? This is key! The quick shock helps release excess steam and prevents the cake from sticking to the side of the pan as it cools.
Cool (The "Sky-Dive")
Quickly flip the entire pan upside down and rest it on a cooling rack (or bottle/cans) without taking the cake out from the pan.
💡 Why it works: Why cool chiffon cake upside down? Gravity is setting the structure. The weight of the cake pulls down slightly, strengthening the cell walls and preventing collapse and shrinkage.
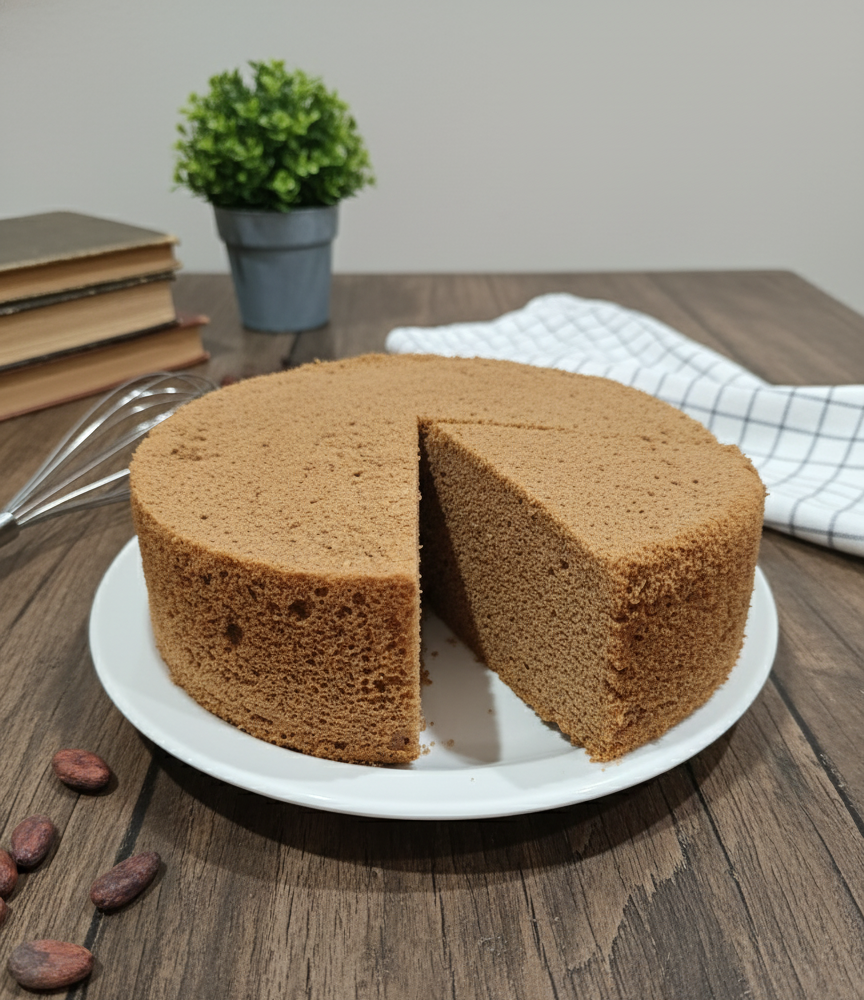
Unmolding & The Grand Reveal
Unmolding
Once the pan is completely at room temperature (about 2 hours), use your finger to gently pull the top edge of the cake away from the pan. Then, push up the cake from the removable bottom.
Show Off the Bottom
Place the cake face down on a surface, open the aluminum foil wrapped around the bottom, take out the cake pan bottom, and gently peel the foil off the cake.
🎉 Now you have a beautiful cake with a uniform bottom. This is usually what you show to your friends to brag about your perfect-looking chiffon cake.
🎨 Now Let's Talk About Flavor Extraction and Food Color
In most recipes, people are making single-color, single-flavor cakes. For ease of processing, you may add the flavor extract and food color in the egg yolk batter during the preparation. In this case, don't worry about the little extra volume of liquid added to the batter; the batter is fairly flexible with some ingredient tweaks as long as you have a stable meringue.
However, if you are like me and find single-color/flavor cakes boring, you can make fancy designs and fusion flavors out of one batter. In this case, an extra step is needed after the standard finished batter. You may split the batter into multiple parts, and add different flavor extracts and/or food colors (gel color preferred) to each part, then assemble them back in the pan.
Creative Chiffon Cake Recipes
Master the basics above, then explore these delicious variations! All recipes are free and include detailed instructions.
Espresso Chiffon
Rich coffee flavor with a perfectly airy texture. Coffee lovers' dream!
Sesame Chiffon
Nutty, aromatic black sesame with an Asian-inspired twist.
Chocolate Chiffon
Decadent cocoa-infused cake that's still incredibly light.
Cranberry Chiffon
Tart, fruity cranberries add a festive pop of flavor.
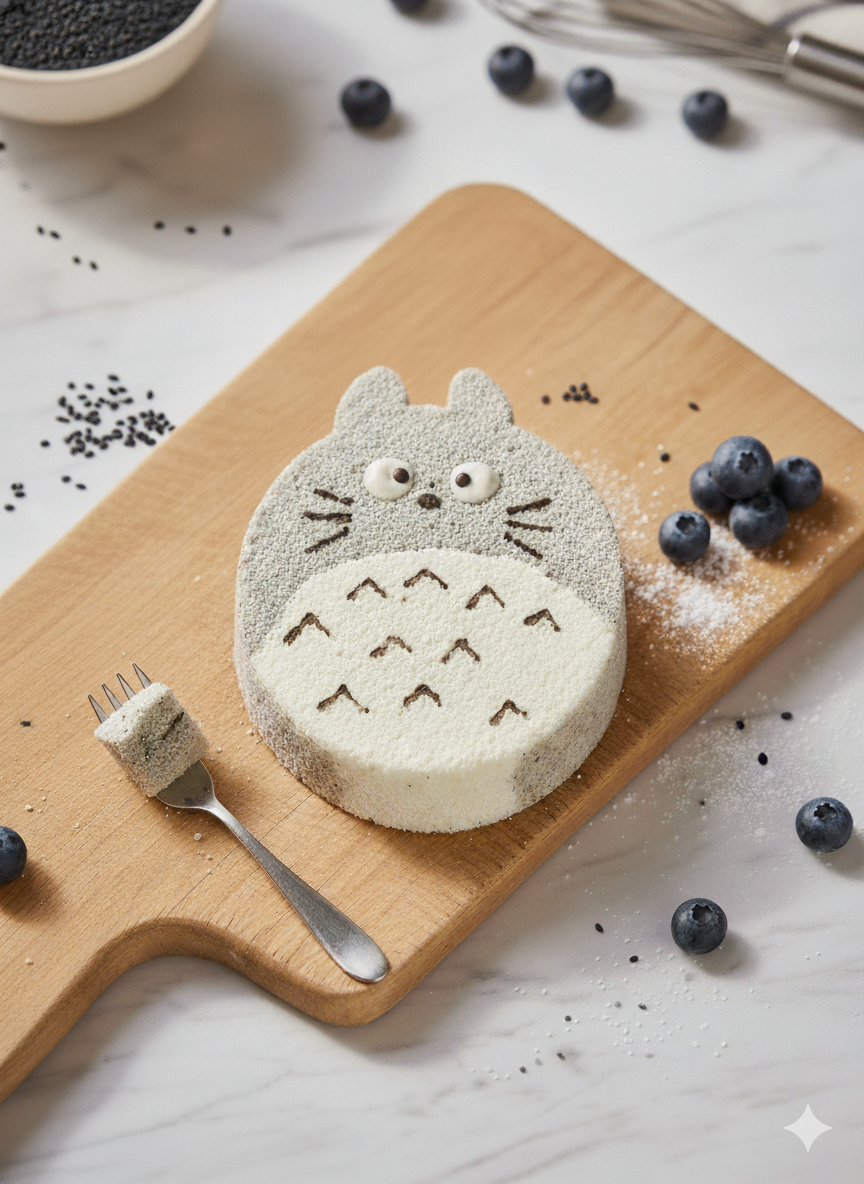
Totoro Chiffon
Adorable matcha-flavored cake shaped like the beloved character!
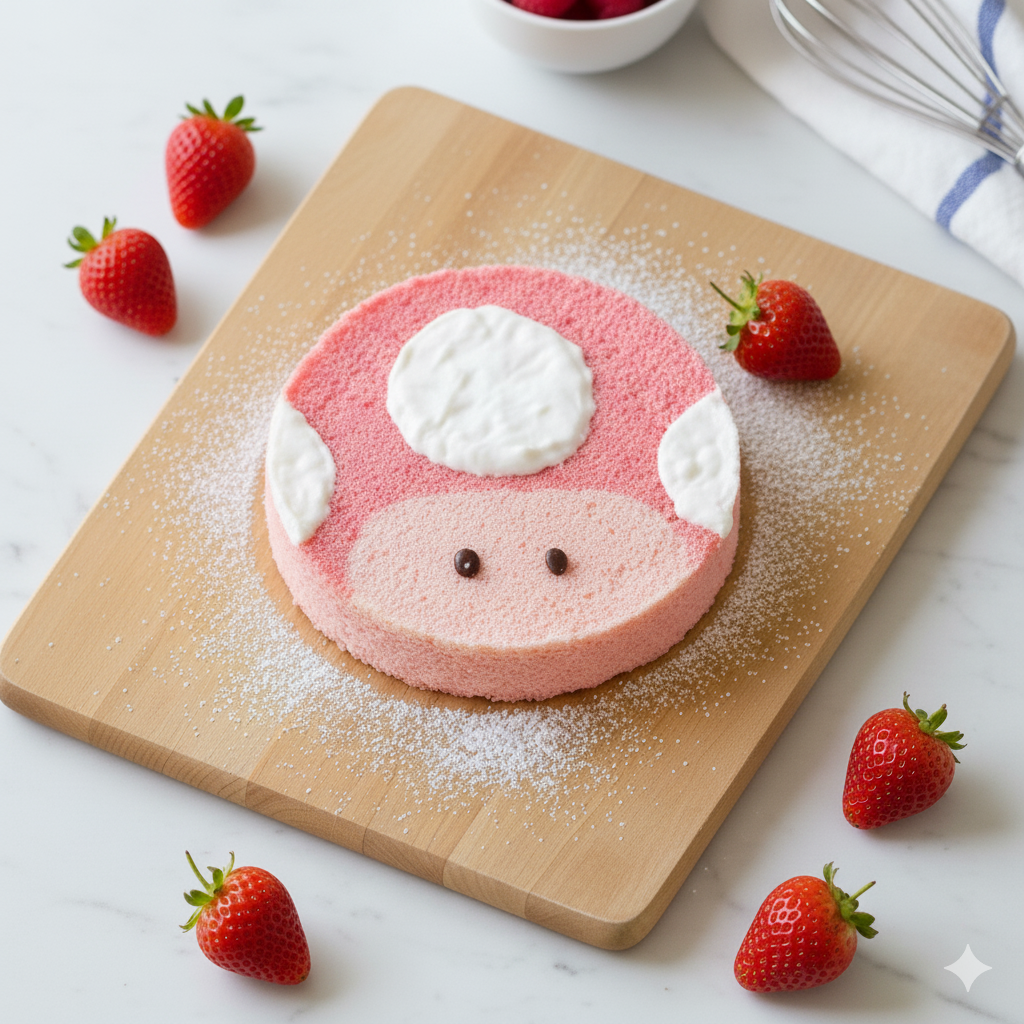
Super Mario Mushroom
Fun, game-inspired strawberry chiffon with iconic mushroom design.
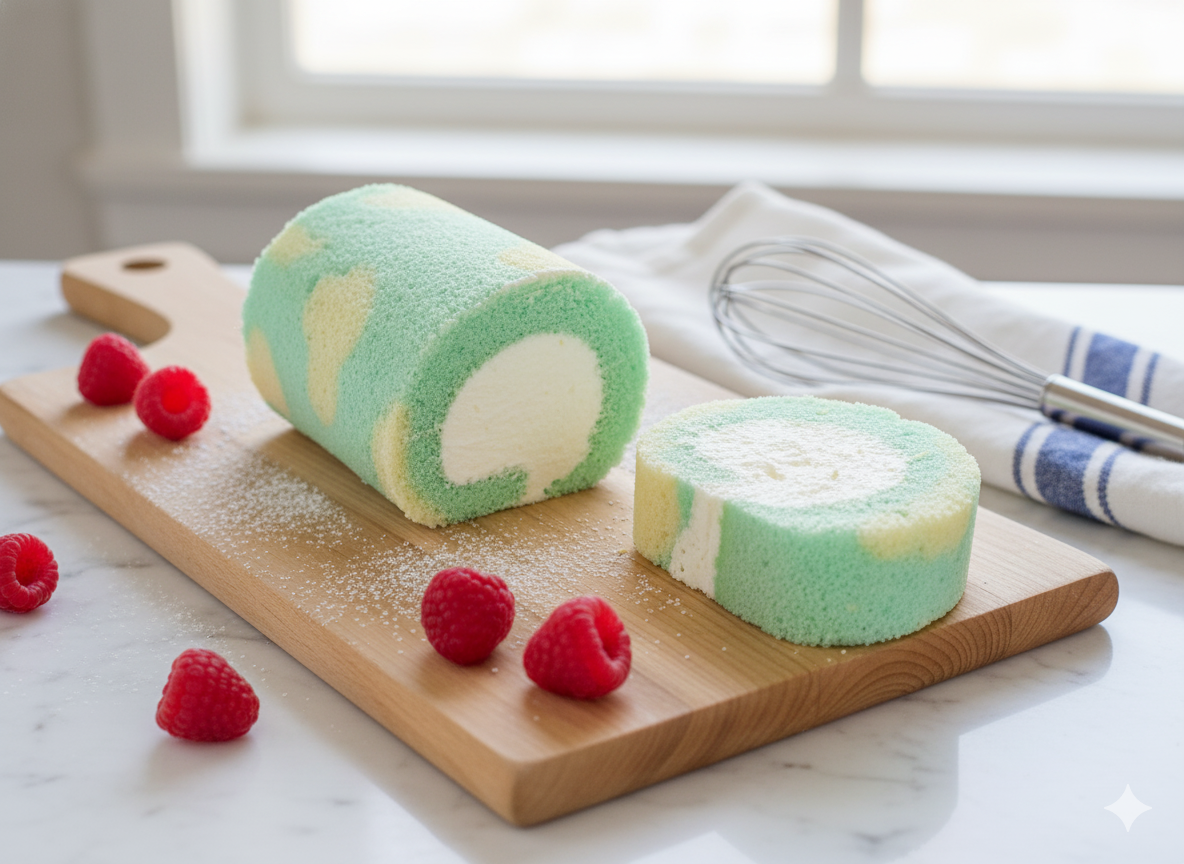
Swiss Rolls
Classic rolled chiffon filled with whipped cream or your favorite filling.
🎉 Scroll Down for Full Recipe Details!
Each recipe includes detailed instructions, ingredient lists, and pro tips to help you succeed.
All completely FREE - no signup required! 🎁
☕ Espresso Chiffon Cake
Rich coffee flavor with a perfectly airy texture
Coming Soon!
This detailed recipe is currently being prepared and will be available here soon. Check back shortly for:
- ✓ Complete ingredient list with measurements
- ✓ Step-by-step instructions
- ✓ Pro tips for perfect results
- ✓ Troubleshooting advice
🥜 Black Sesame Chiffon Cake
Nutty, aromatic Asian-inspired delight
Coming Soon!
This detailed recipe is currently being prepared and will be available here soon. Check back shortly for the complete recipe with all measurements and instructions!
🍫 Chocolate Chiffon Cake
Decadent cocoa-infused cake that's still incredibly light
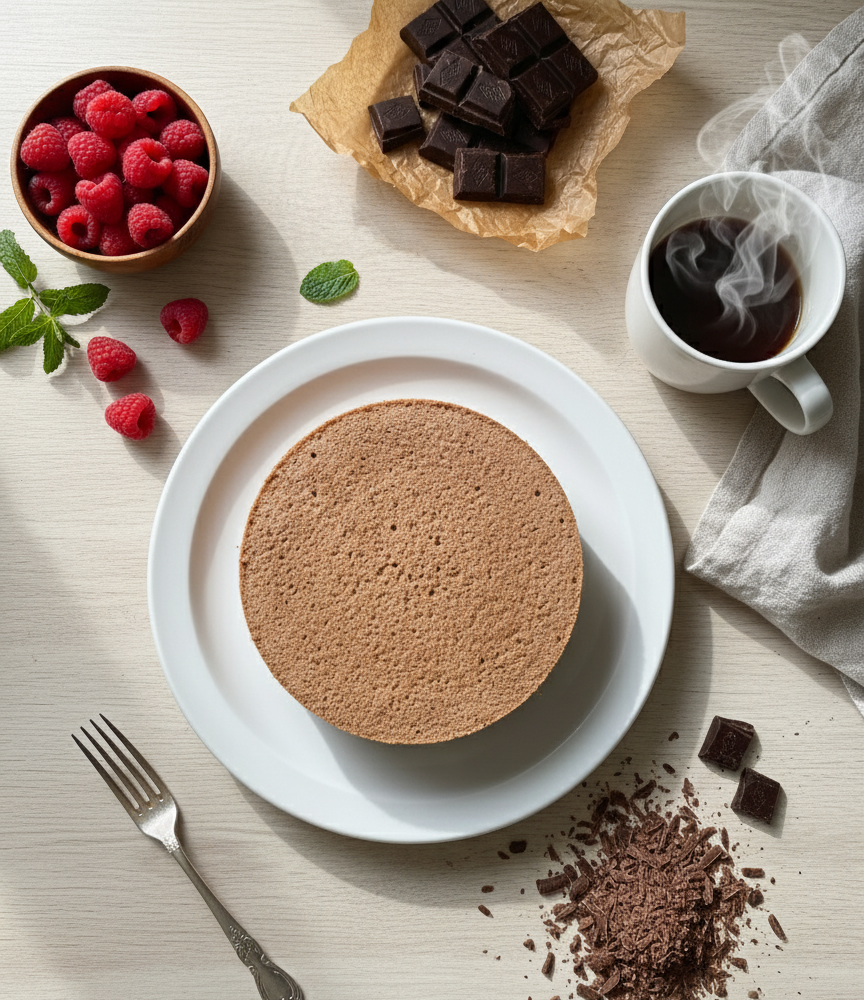
Chocolate Chiffon Cake
Rich chocolate flavor
| Ingredient | Quantity |
|---|---|
| Egg | 3 large eggs, separated |
| Chocolate | 30g (any of your favorite chocolate) |
| Granulated Sugar | 30g (up to 50g to your taste) |
| Milk | 30g |
| Liquid Oil | 45g |
| Flour | 50g |
| Cream of Tartar | 2-3 shakes |
🔥 Baking: 300°F (150°C) for 45-50 minutes
Chocolate: Use any of your favorite chocolate for rich flavor.
Sugar: Adjust to your sweetness preference (30g to 50g).
Temperature: Keep eggs and milk at room temperature.
Process
Step-by-step instructions
Warm up the eggs and the milk to room temperature.
Warm up the oil (in microwave ~10-15s) until warm to touch.
Melt the chocolate in oil until smooth.
Mix the flour into the chocolate oil mix, until smooth.
Note: The rest of the process is the same as the master recipe.
Separate the eggs and drop the egg yolk into the oil mix, and leave the white in an oil/water free mixing bowl.
Add milk to oil mix, and mix everything, set the yolk batter mix aside.
Add all the sugar and the cream of tartar into the egg white. Beat the egg white to proper peak status.
Pre-heat oven to 300°F, and wrap the cake pan bottom with aluminum foil.
Mix the yolk batter and meringue, and pour into the pan.
Tap the pan, start baking for 45-50 minutes.
Take out the pan right away, tap once, and cool on cooling rack upside down for ~2 hours.
💡 Important Notes
-
•
Some chiffon cakes are made with cocoa powder, but using real chocolate gives a much richer chocolate flavor.
-
•
Since chocolate solidifies at low temperature, you need to be careful to keep all ingredients (egg, milk) at room temperature.
🫐 Cranberry Chiffon Cake
Tart, fruity cranberries add a festive pop of flavor
Coming Soon!
This detailed recipe is currently being prepared and will be available here soon. Check back shortly for the complete recipe with all measurements and instructions!
🍃 Totoro Matcha Chiffon Cake
Adorable character cake with delicious matcha flavor
Coming Soon!
This detailed recipe is currently being prepared and will be available here soon. Check back shortly for the complete recipe with all measurements and instructions!
🍄 Super Mario Mushroom Chiffon
Fun game-inspired strawberry chiffon design
Coming Soon!
This detailed recipe is currently being prepared and will be available here soon. Check back shortly for the complete recipe with all measurements and instructions!
🎂 Chiffon Swiss Roll
Classic rolled cake with your favorite filling
Coming Soon!
This detailed recipe is currently being prepared and will be available here soon. Check back shortly for the complete recipe with all measurements and instructions!